Creating an email campaign
How to send branded press releases and updates to your contacts.
An email campaign in Prezly lets you send your stories, press releases, and announcements to multiple contacts at once. Unlike one-to-one pitches, campaigns are designed for bulk distribution.
Why use campaigns instead of your regular email client?
- See who opened, clicked, and engaged with your content
- Add your site/newsroom branding automatically
- Share multimedia assets (images, video, audio, attachments)
- Have reliable deliverability and GDPR compliance
- Save time by distributing to multiple contact lists at once
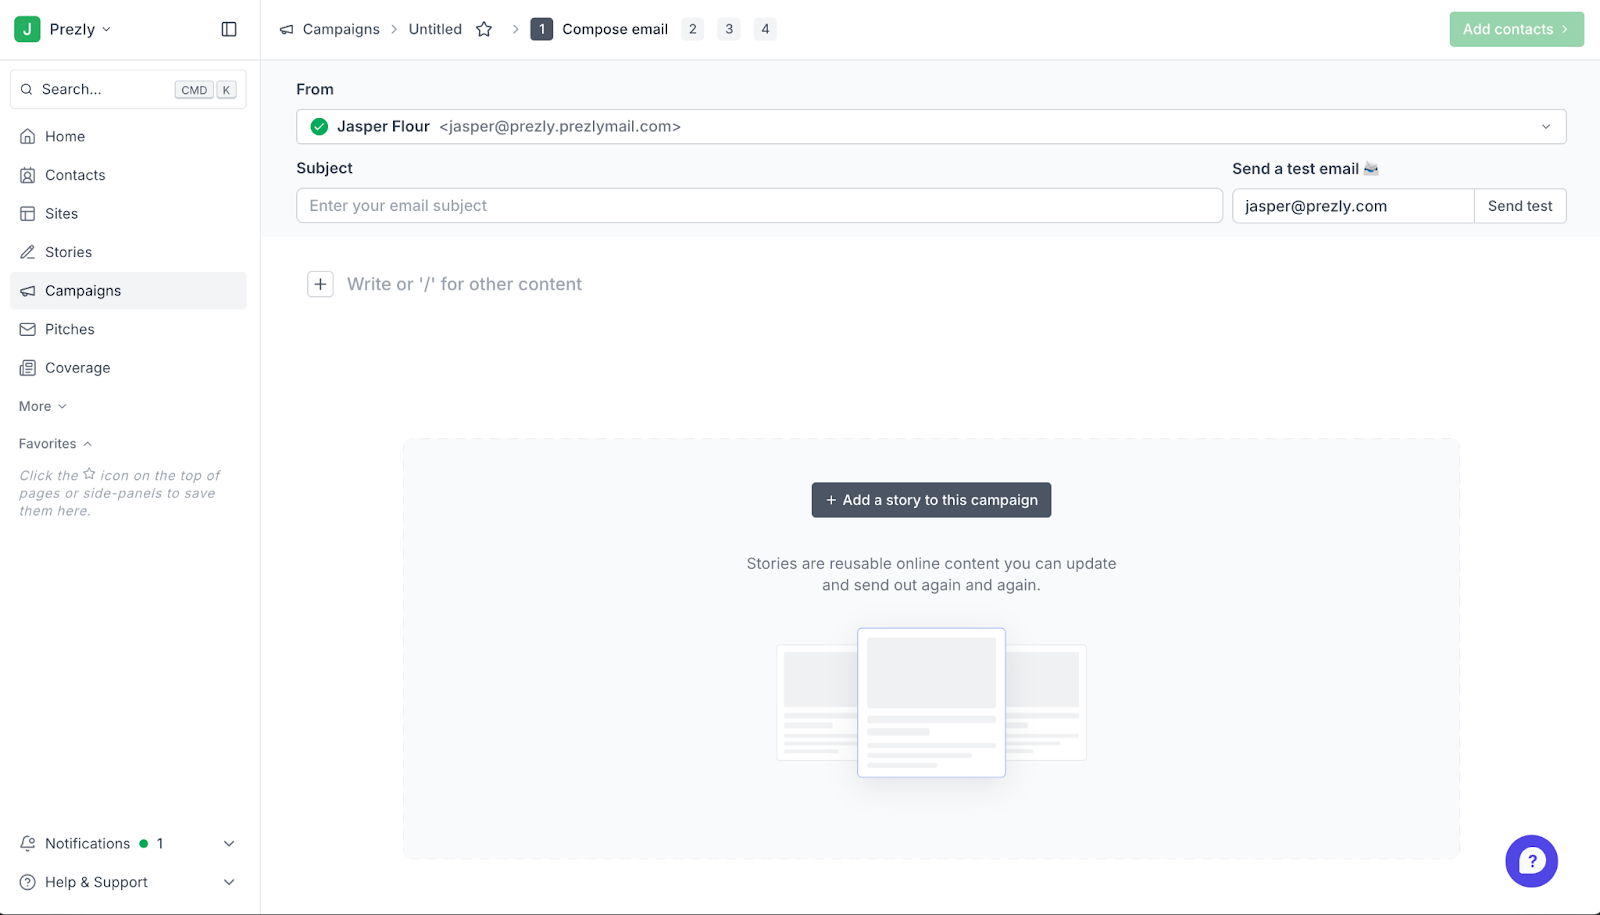
The campaign composer is where you write and design your email. To access it, select Campaigns from the navigation panel on the left of your screen, and click Create campaign.
Type or copy-paste your email content into the composer to create your email, and personalize it with some of the options below:
Use the dropdown in the From field to select what sender address you want the campaign to come from. Learn how to set your default sender address →
Typing % will give you the option to insert dynamic content, like first name, last name, and full name. For first name, you will be given the option to define a fallback for when there is no first name available.
To embed multimedia in the body of your campaign, start a new line in your composer and click the + button that appears to select the type of media you want to upload. You can also start typing the media type preceded by a / as a shortcut, e.g. /video.
Adding media to your campaign works much the same way as adding media to your story. For the full list of supported multimedia and further details, visit how to add multimedia to your stories.
Use the Add a story to this campaign button to select a published story from one of your Prezly sites, and embed it into your campaign.
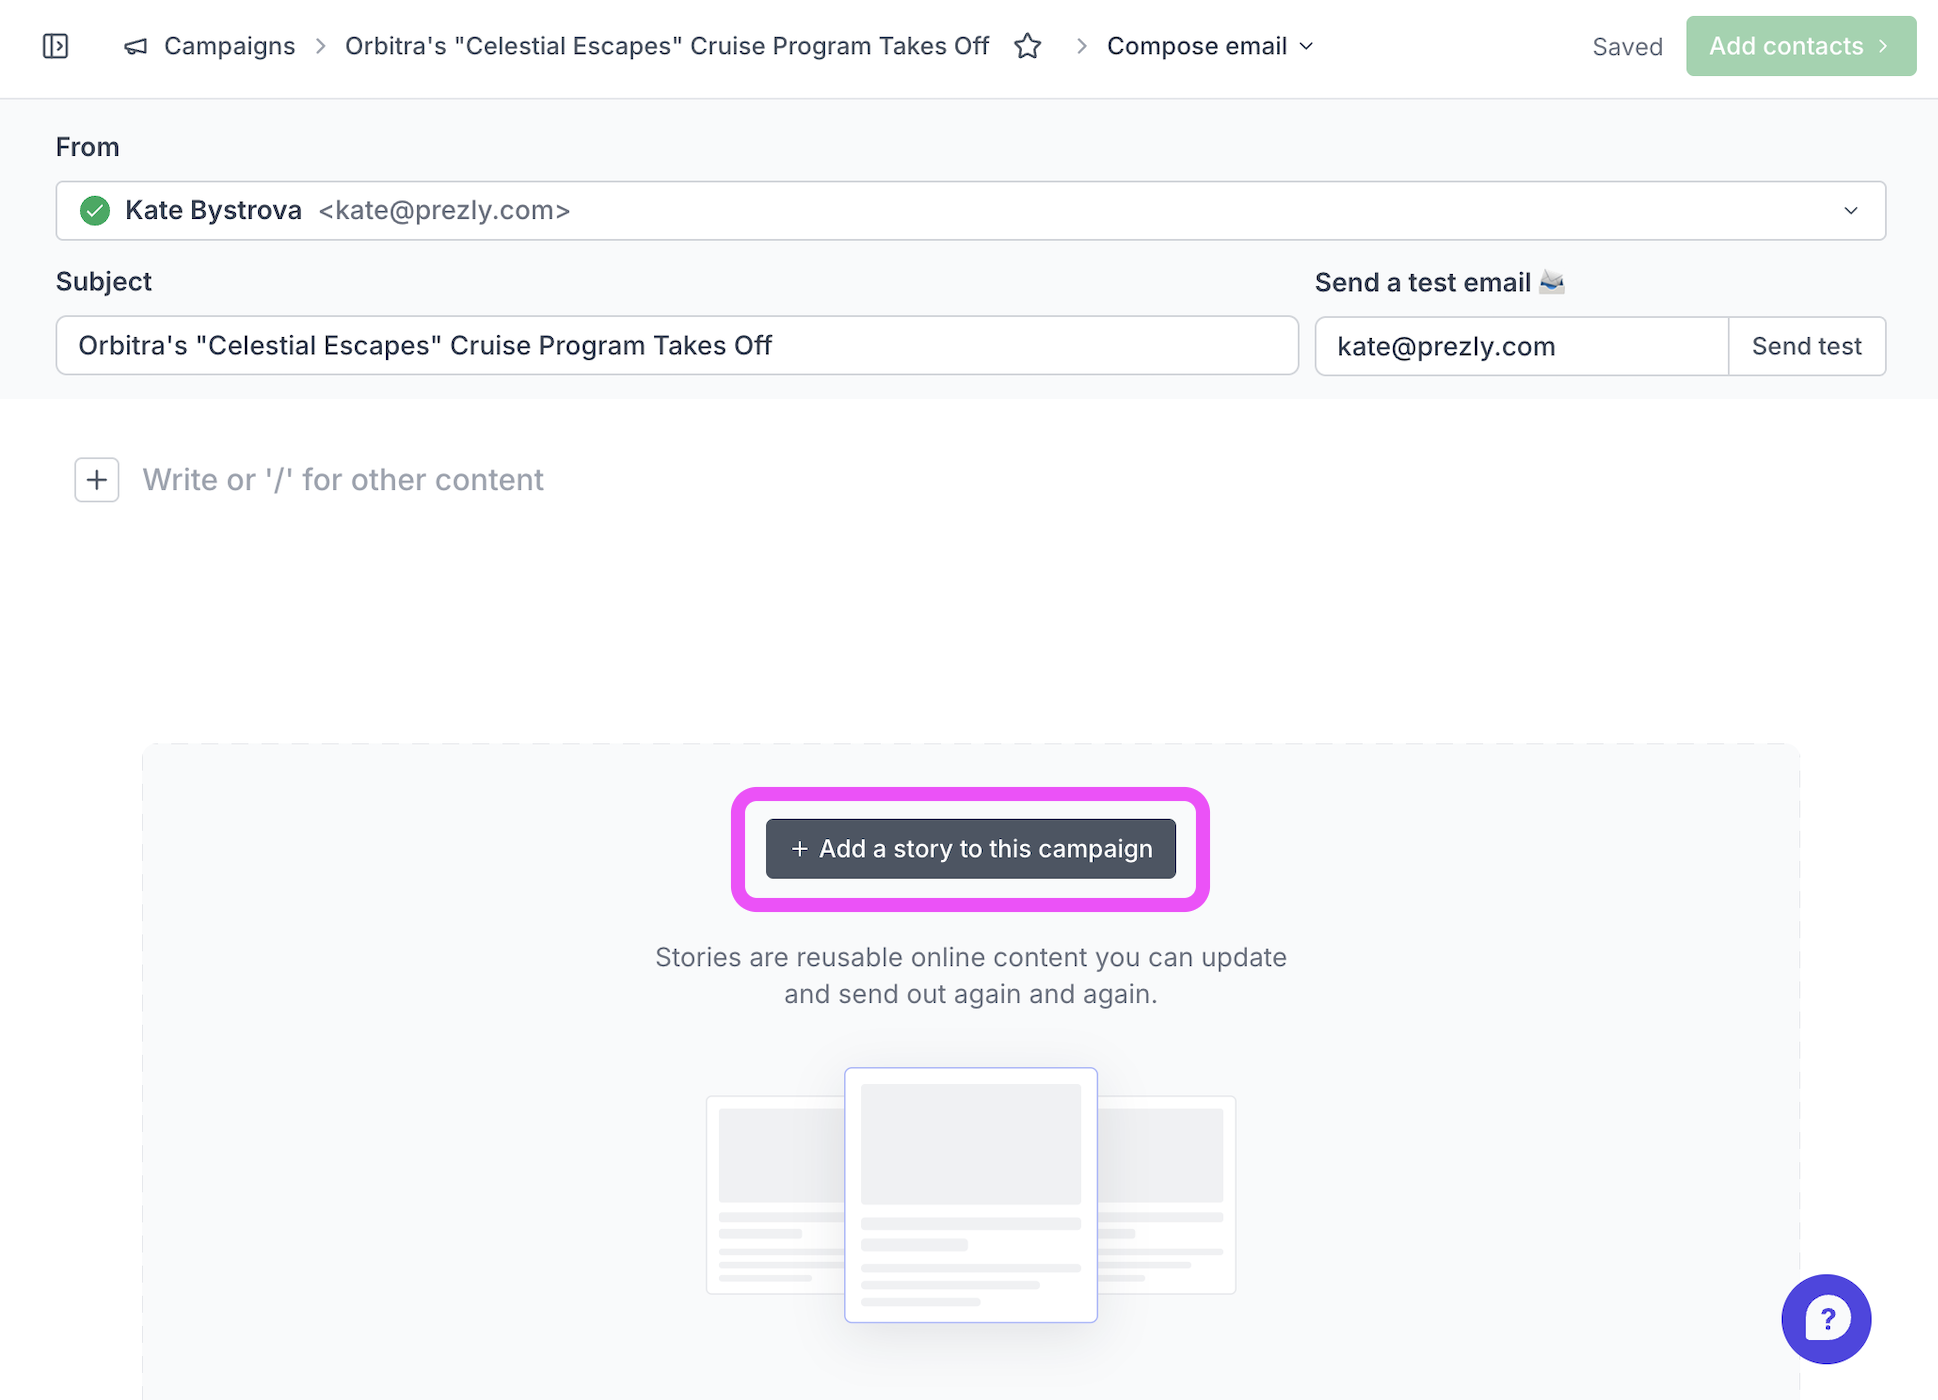
When attaching a story to a pitch or campaign, you can choose to show your site’s header and footer for consistent branding and easy navigation back to your site. By default, the header uses your site logo, but you can upload a different logo in Site settings.
Display options:
- None – no header or footer.
- Standard – header with site logo; footer with latest stories, media galleries, search, and social links.
- Full – header with logo + latest stories; footer with about info, contacts, latest stories, media galleries, search, and social links.
Colors and alignment follow your site branding, with further customization available in Branding settings.

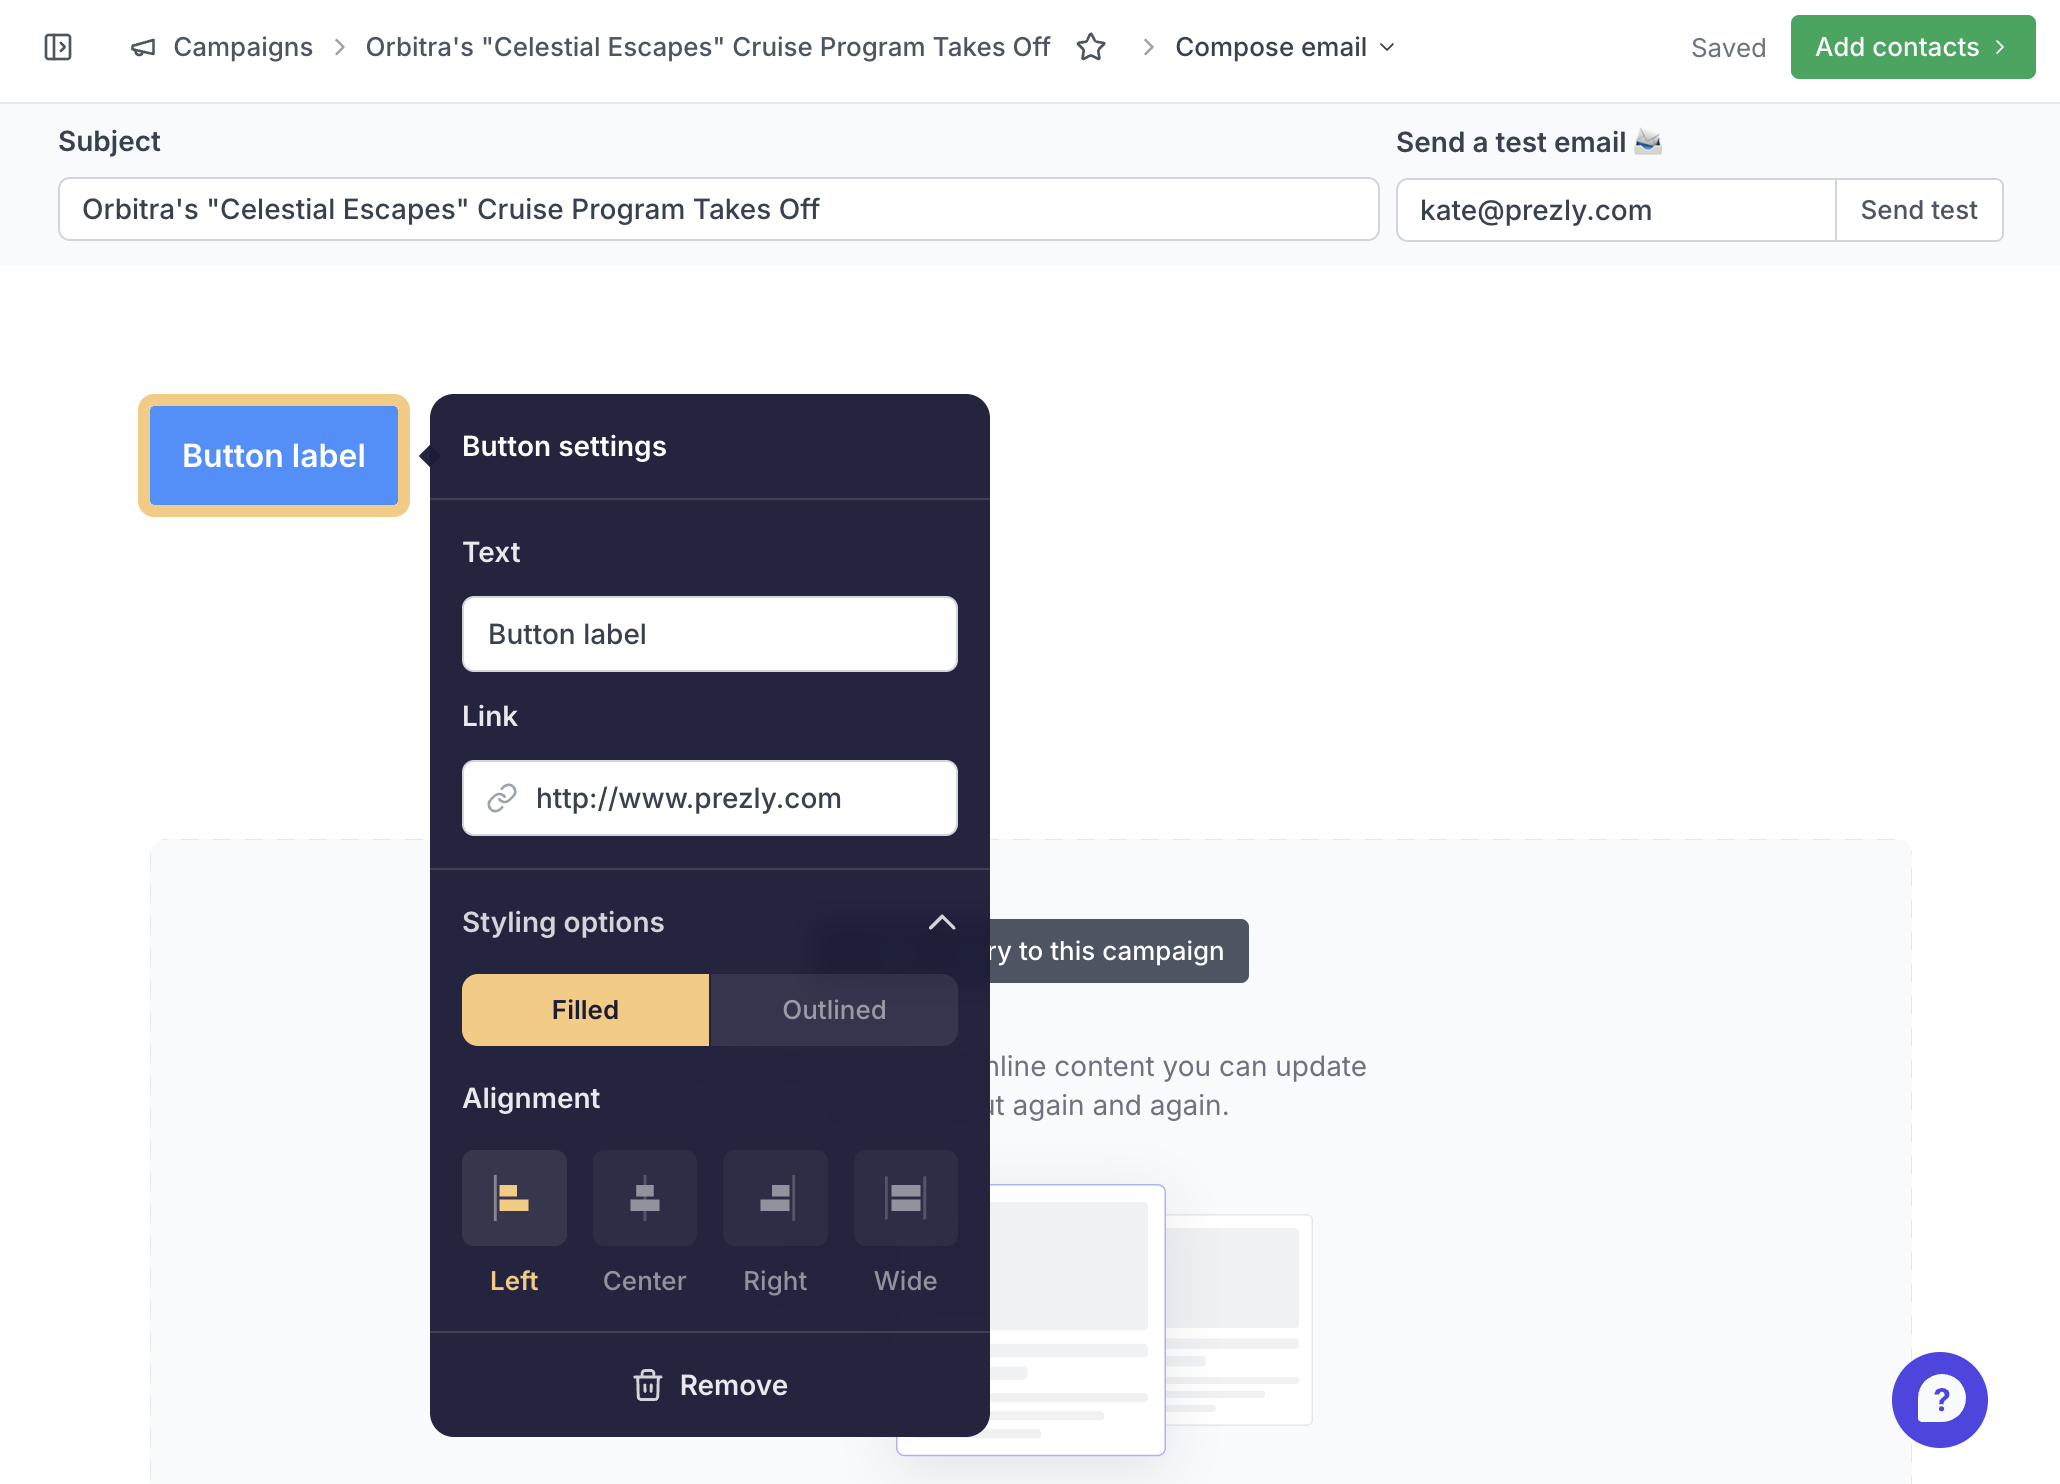
- Click the + button in the editor and select Button from the dropdown to add a button to your campaign (or type /button, /cta or /call to action on a new line)
- Add a label and a link (without a link, the button won’t show)
- Adjust styling and alignment under Styling options
Embed a site contact as a signature by typing /site contact onto a new line. Click on the card that appears to choose how it displays in your campaign.
All large campaigns must include an unsubscribe link for GDPR compliance.
- When a story is attached attached to the campaign: the unsubscribe link is added automatically and unsubscribes only from that newsroom’s emails
- When there is no story attached to the campaign: you can manually add an unsubscribe link, which unsubscribes from all emails sent from your Prezly account. To do this, insert a hyperlink and select Link to unsubscribe under Common links
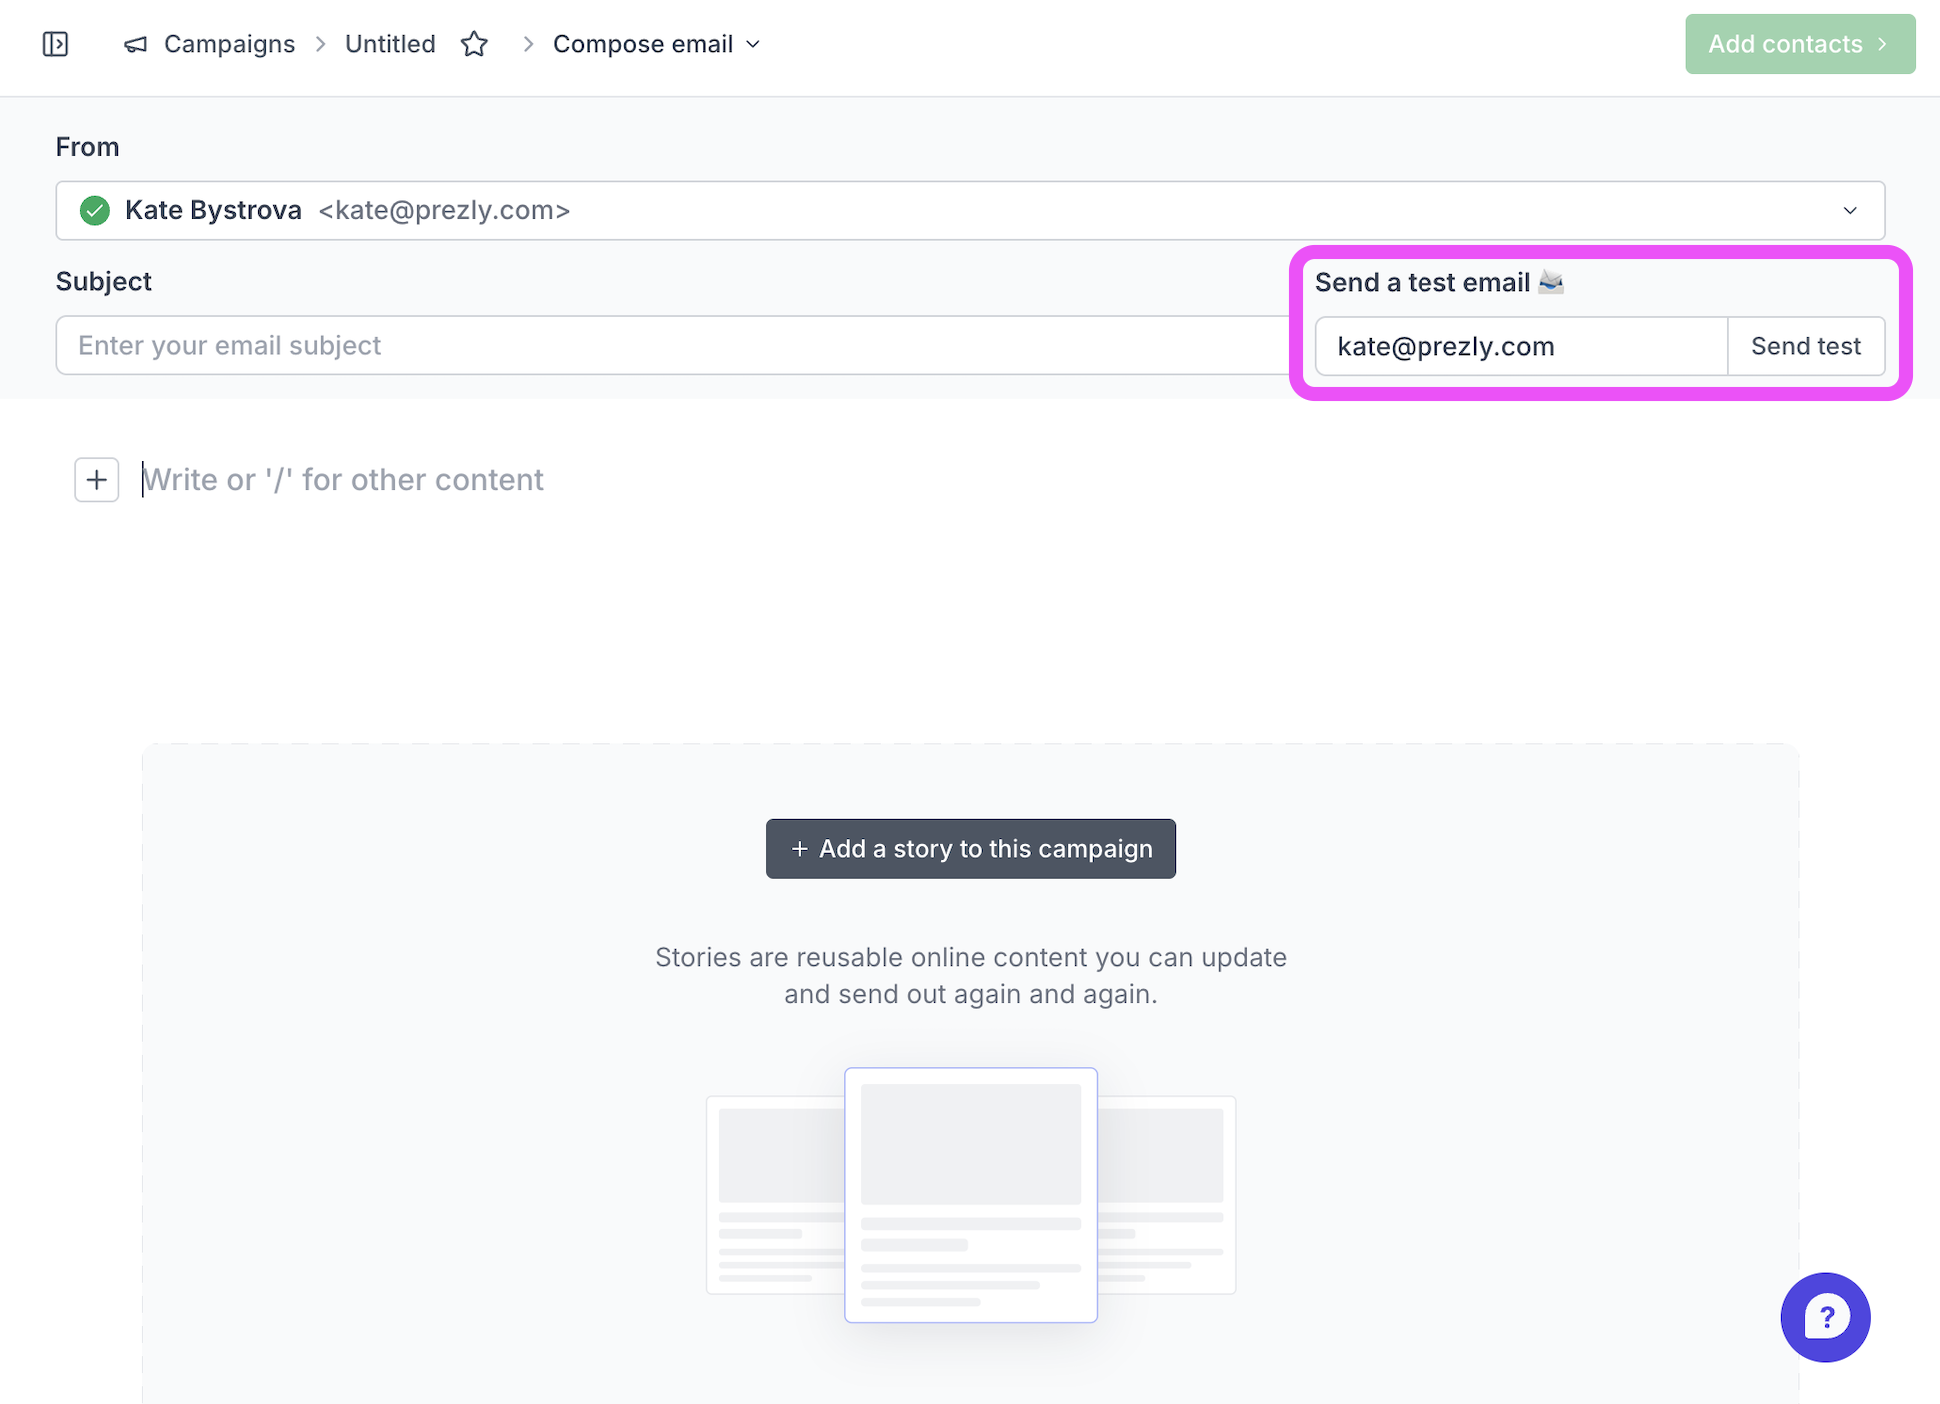
Click Send test to send a preview of your campaign to yourself or your team or client. Sending a test email is the best way to double-check design, links, and personalization.
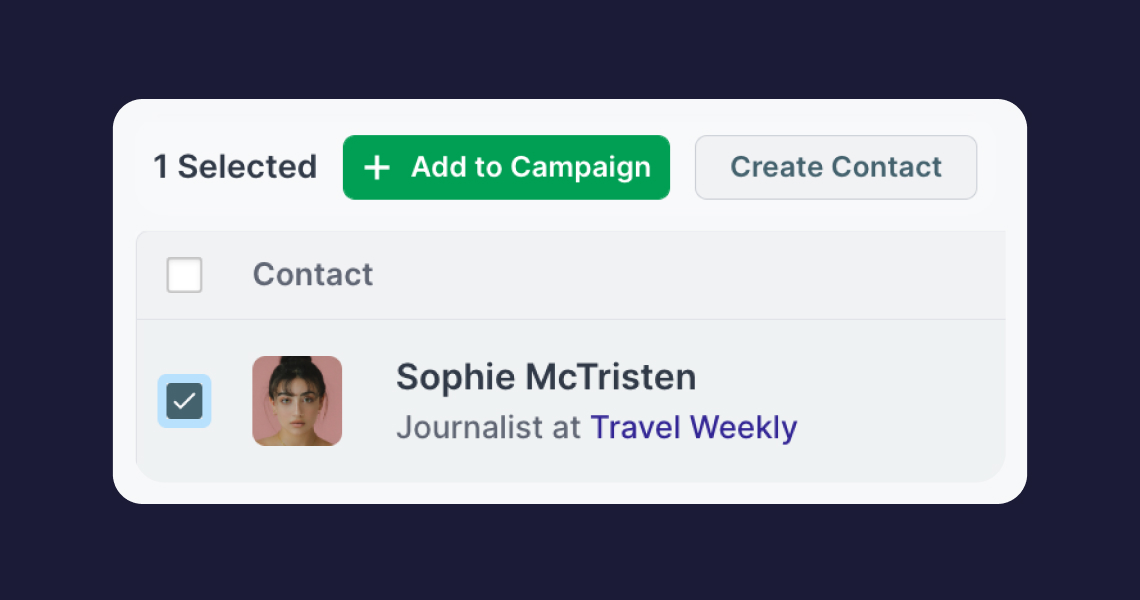
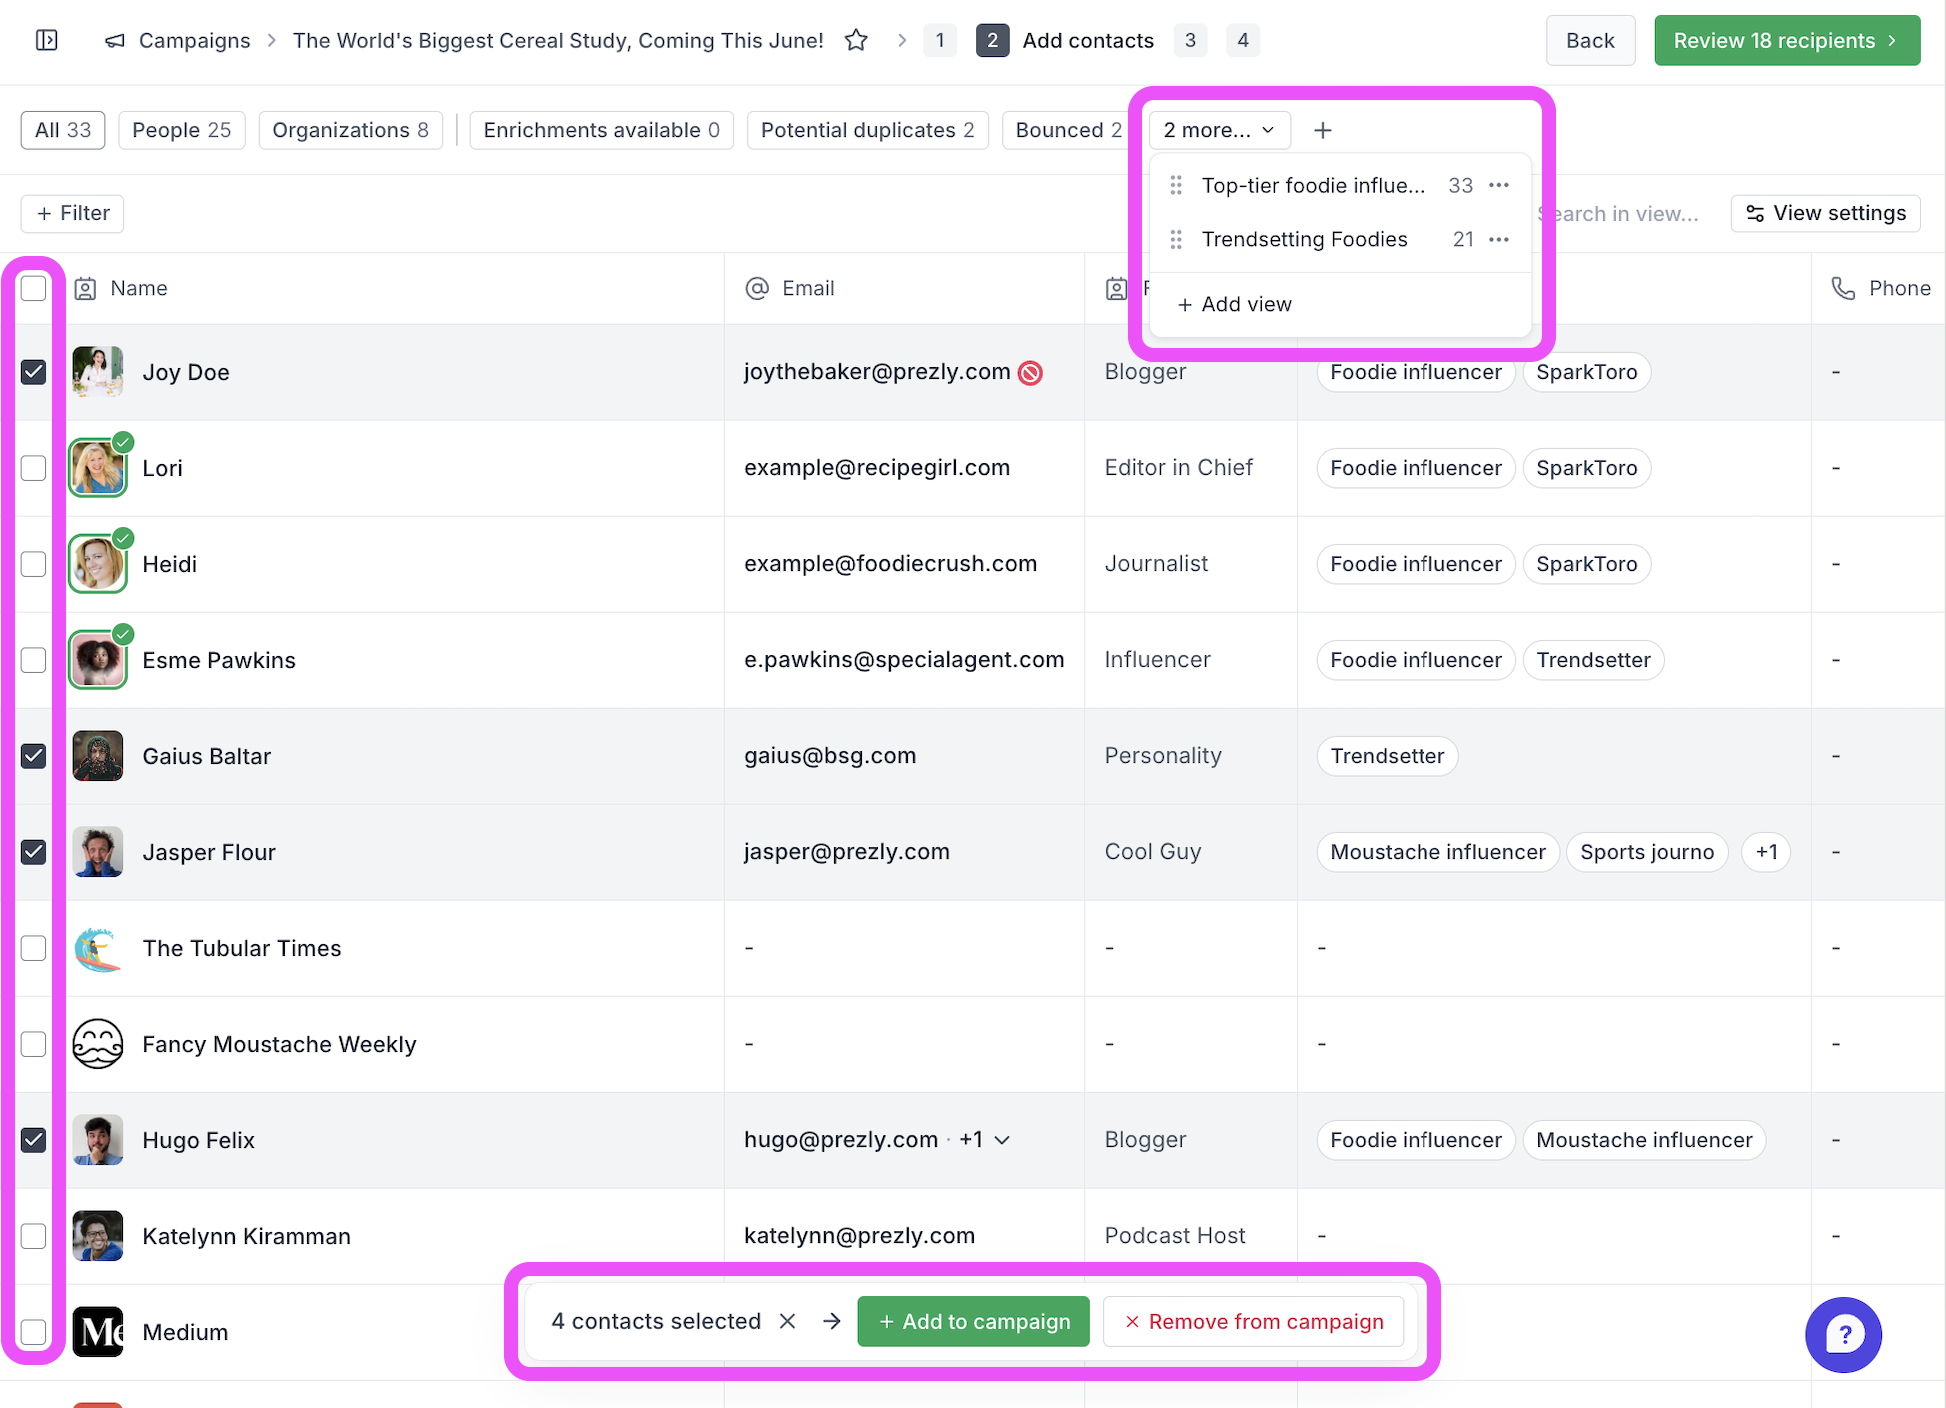
Choose who should receive your campaign:
- Add contacts individually
- Select a contact view to send your campaign to a contact list you made
- Filter contacts by contact tags, outlets, or other fields
Watch the video at the top of this page to see this step in action.
Before sending, Prezly will highlight any issues, such as:
- Bounced or unsubscribed contacts
- Contacts missing email addresses
- Duplicates
Reviewing this list and updating the affected contacts will help you avoid delivery errors.
Watch the video at the top of this page to see this step in action.
Bounced contacts are automatically reviewed by Prezly once per day, so you always get a clear picture of who is likely to receive your campaign.
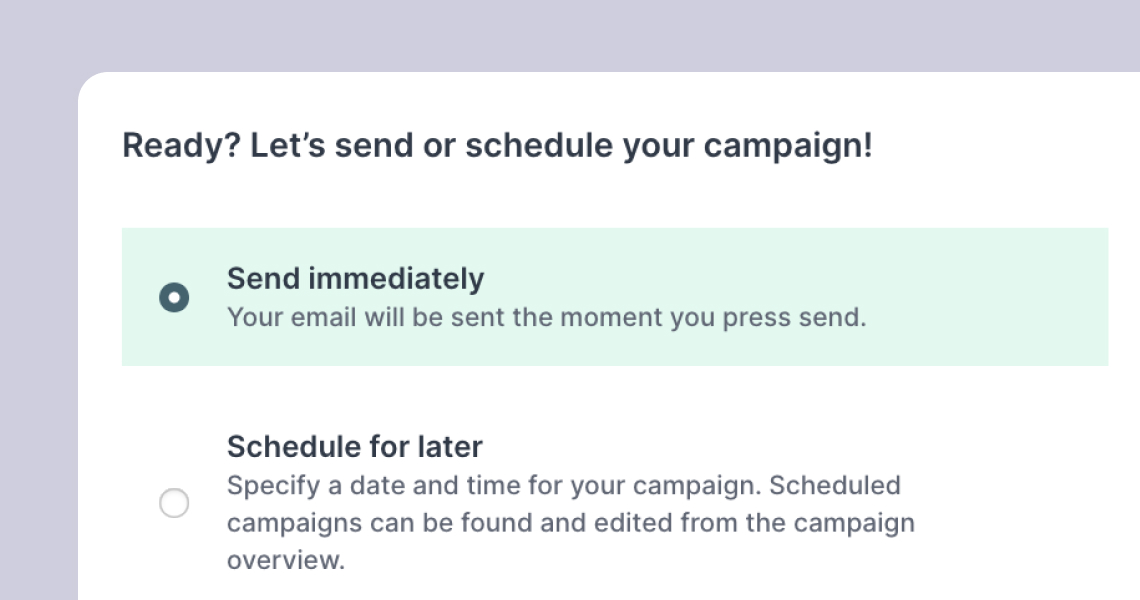
Once everything looks good, you can:
- Send immediately and deliver right away
- Schedule for later, then choose a date and time for automatic delivery
At this stage, you can also give your recipients a final review, go back to edit the email content, and disable open and click tracking.

Yes. You can make changes to a scheduled campaign up until the scheduled send time.
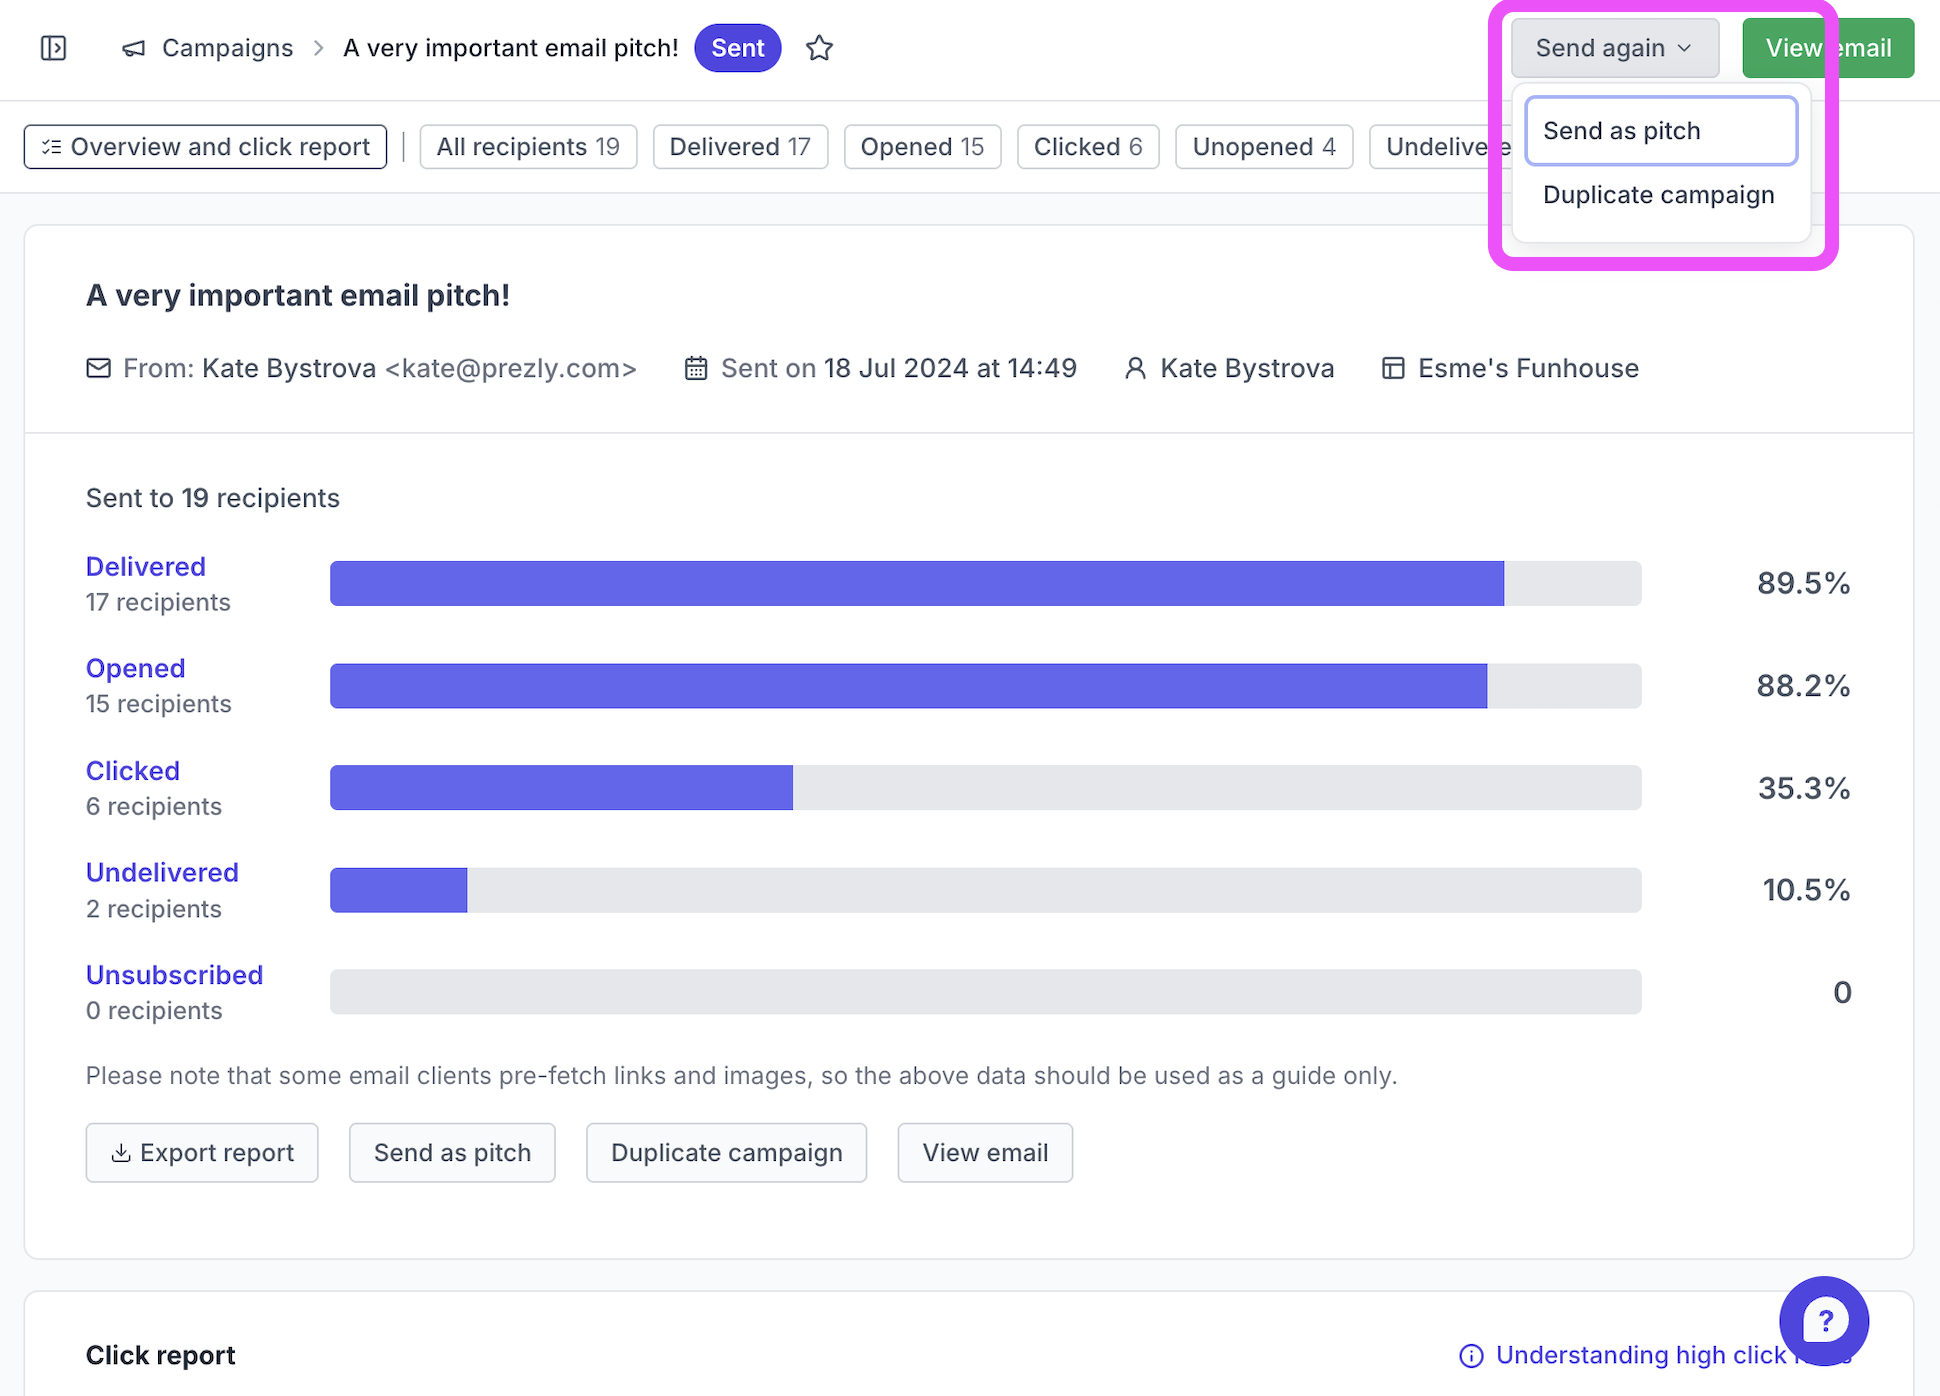
No, you cannot add contacts to a campaign that has already been sent – but you can easily duplicate your sent campaign and send that to additional recipients.
If you're sending your campaign to just one additional person, you might want to select the send pitch option instead.
Access both options using the ··· menu on any sent campaign in your campaigns grid, or the Send again dropdown in the top-right of the campaign report page.